The Image Trace module can seize lots of of thousands of colors contrary to the old Live Trace, which may only do 256 colors. Most probably you get higher outcomes when vectorizing this manually or when spending much more time on lighting in the photo studio and on picture preparation in Photoshop. Unlike raster images, vector pictures are made up of mathematical paths that enable the design to be scaled infinitely while retaining its high quality. You are left with a vector picture that you can save as a PSD file or export in a format like SVG.
If you’re sending art work to print, Solopress supply low prices and free UK subsequent day delivery. With the element chosen, select one of the Image Trace presets from the Preset dropdown. I suggest beginning with Black and White Logo for most of these lettering tasks.
After having accomplished the hint if you want to edit the paths, you need to Expand the Image hint art work. Hit the button namedExpandin the Control panel or the Properties panel. You then get editable paths you could additional edit. It’s always better to optimize the Image Trace options than to edit the paths afterwards. Especially for a lot of multi-color artworks enhancing is close to unimaginable.
The Way To Hint A Picture To Vector With Illustrator
With the trace accomplished, you might want to remove parts of it. In this instance, we want the cow with out the background. Switch to the Direct Selection device and choose the background shapes, then press Delete on the keyboard to take away those shapes. In the Properties panel, go to the Quick Actions section and choose Expand to see the collection of paths. After putting the picture, click it, then go to the Illustrator Properties panel. With a raster picture positioned in to your doc and selected click the ‘IMAGE TRACE’ button in the management bar.
) from the Fill Color drop-down menu and choose the colour black from the Stroke Color drop-down menu, if it isn’t already selected. Choose 2 pt from the Stroke Weight drop-down menu. Then in the Image Trace panel you can choose your library from the Palette menu. Illustrator assigns the colors from the library to the original colors by its personal algorithms – you don’t have an affect on that. To further regulate the end result, you should examine how exact the paths follow the supply. Press and maintain the View Source button to modify quickly to the supply picture to establish the areas that need improvement.
Step 1: Scan Or Take A Photograph Of Your Work
Once you’ve named it, it will turn out to be available within the presets drop down menu. Illustrator CC supplies an Image Trace function that converts raster pictures into editable vectors. Using the Image Trace characteristic, you choose from numerous presets to help you create the best conversion and achieve the results that you want.
As with most tools in Adobe Illustrator the Image Trace device is superb however does have its limits. Several choices determine the result of your image trace. To provide you with a start, some presets supply solutions for different sort of outcomes. You can apply them after which nice-tune to suit your wants.
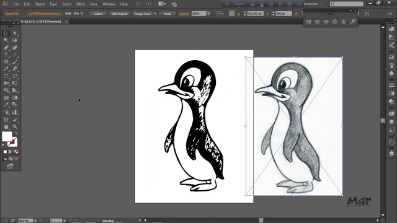
It’s important to isolate portraits in case you want to hint them in the 1-color stencil paintings . With the Image Trace operate, you can vectorize pixel-based images mechanically in Illustrator. People usually check with this type of perform as Autotracing. The outcomes rely upon the nature, quality, and size of the supply picture and the settings you choose in Illustrator. So to get good results you need to start with the supply picture. You can click to fill the image with any chosen swatch from the swatches panel or use your cursors to toggle to different swatches.